Art for Any Room

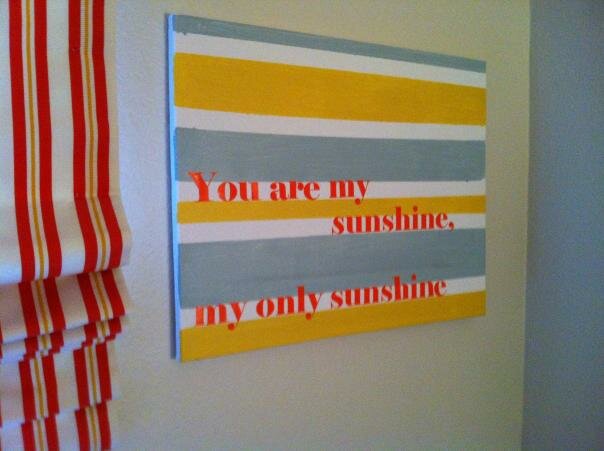
We moved into our house over two years ago, and once I got those last boxes unpacked I was over it. So, I never really got around to any formal decorating. Sure, we have a few pictures out and draperies hung…but overall, I’m just not feeling the “decoration motivation.” Except for one place – my son’s room. I had the best time transforming his tiny space into a cheerful, colorful little nest. Today’s project is one of many that I did for his room – wall art.
In a nutshell, I chose a phrase that fit the overall theme of the room and made it into canvas art (we’re into canvases lately here on Out of Office). I got my inspiration from Design Dazzle, and you can check out how they did the project here. This is particularly great for folks like me – I can’t paint all that well nor do I have cute handwriting, so using a printed design for the phrase sure did make it easier for me.
Here’s how I did it:
First, gather your supplies. You’ll need paint (I actually used some leftover wall paint and it worked well), paintbrushes and a canvas from any craft store (you can pick the size). You can see all my supplies below.


Next, paint the canvas. I painted mine with a sun to match the phrase I was using, but you could do anything – stripes, swirls, polka dots, etc. You can even embellish it with glitter or texturing – just be careful not to do this in the space where you want to place the vinyl letters. They need to be applied to an even surface.
Speaking of vinyl letters, you’ll need to have some made. The process for creating the vinyl is very similar to how guest blogger Lynsey made the monogram for her daughter’s wall.
Start by designing the lettering – I used a simple font and the phrase “you are my sunshine,” which is a favorite little ditty of mine. I saved the file of my design on a jump drive and took it to my local FedEx Office (look up the address for your nearest center here) and worked with the folks there to see a proof. There was a one-day turnaround for my project.
Insert inline
The vinyl is sandwiched between two protective sheets, so you‘ll need to peel off the back sheet and then smooth the letters onto the canvas. Apply moderately firm pressure to make sure you get all of the letters transferred. Then gently – and slowly – peel off the second backing sheet. I recommend peeling it at an angle. Guest blogger Lynsey showed this process step by step in her video,and your project will come with instructions.

And here’s the process:


Finally, hang your art. Since this requires a hammer and nails, I’d say it’s the hardest part of the project!


Comments
amazing art for the room like
amazing art for the room like it so much.
Post new comment